Today we’re going to talk about partitions. What is it anyway?
A partition is a specific area of a hard drive, which has a beginning and an ending point, and the space between those points equals the total amount of size the partition defines.
Sometimes people confuse a partition with a volume, but there is a big difference between the two.
A volume is a file system on a partition your Mac or PC can recognize. Common types of volumes include DVDs, hard drives, and partitions or sections of hard drives.
Practically any type of storage you use for your Mac (SSDs, hard drives, USB flash drives, etc.) can be divided into partitions. Each partition can use one of four formats compatible with OS X: HFS/HFS+ (simple and encrypted), ExFAT and FAT.
There are good reasons to split your device into multiple partitions. For example, you want to run multiple versions of OS X on your Mac; organize your data PC-style; manage your backups efficiently or run Windows on your Mac. Especially if you are a big fan of OS X and install all OS X beta-versions, it is strongly recommended by Apple to install all beta versions on a separate partitions, as they can truly ruin your Mac!
To partition a drive, we can use the Disk Utility – a built-in Mac program to manage your hard drives.
NB: Your data will be erased during the procedure, so be sure to back up the information first.
- Step 1: Open the Disk Utility by searching for it via Spotlight or finding it in Applications > Utilities
- Step 2: Select the storage device you want to partition from the left pane. The selected drive will appear in the right pane together with its details, such as location, the way it’s connected, and the partition map in use
- Step 3: Select the drive and then click the Partition button in the Disk Utility’s Toolbar. You will see a drop-down panel displaying a pie chart of how the drive is currently divided
- Step 4: To add a partition, click the plus (+) button right below the pie chart
- Step 5: Enter a name for the volume in the Partition field to be displayed on your Mac’s desktop. Press Apply
You can also adjust the volume size by either entering its value in the text box, or by shifting a pie slice anchor in the required direction.
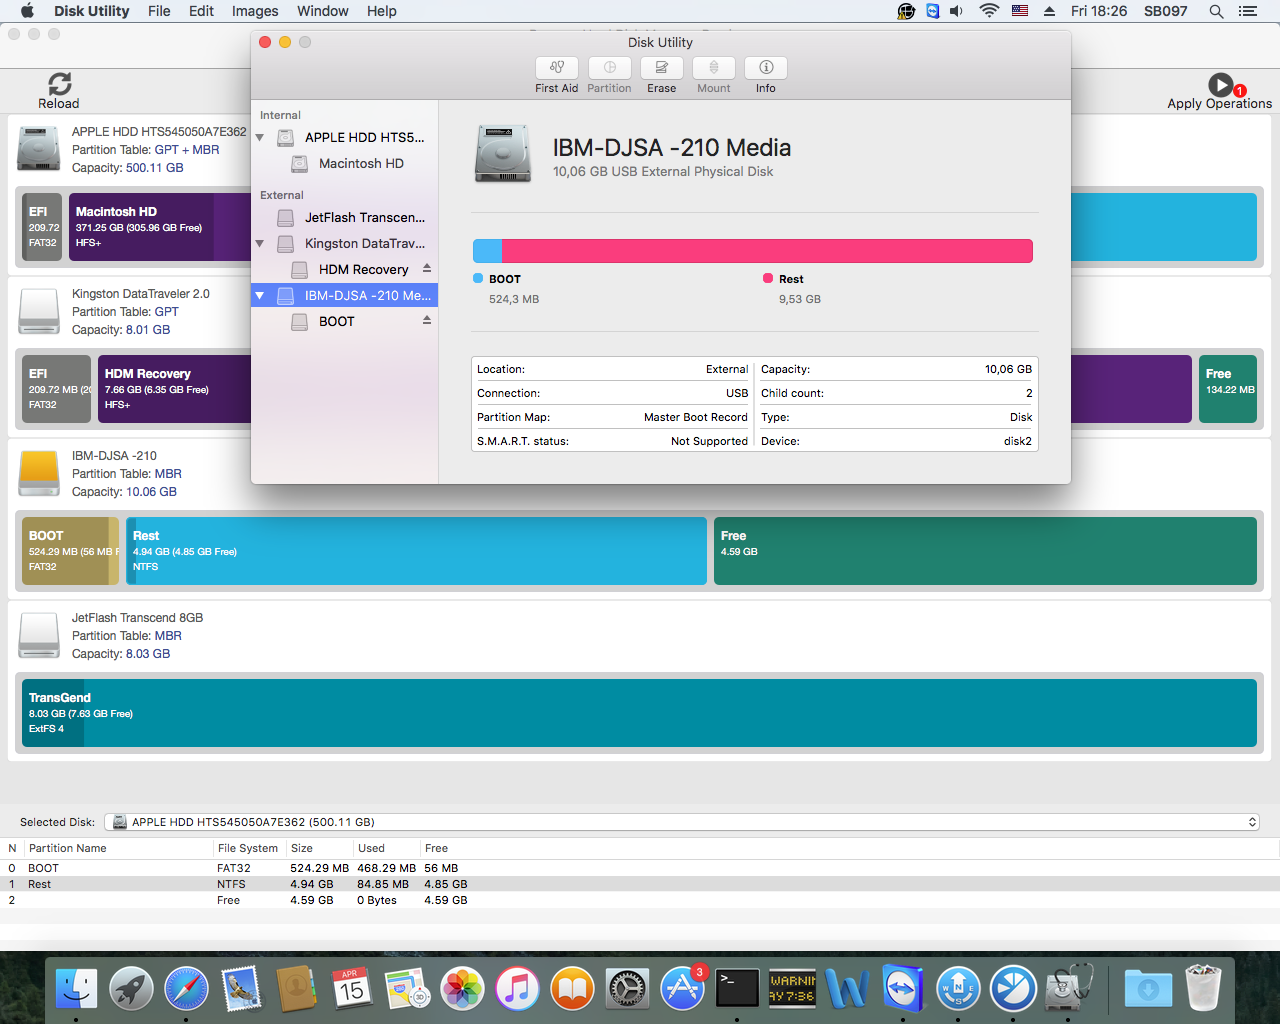
However, some errors might occur in the process, causing you to end up with an unallocated space on your disk unseen in the Disk Utility. An unallocated space is like a void on your hard drive you can’t detect and use with Mac’s inbuilt apps. The only way to manage such space is to use the Terminal, but it is rather complicated and may lead to corruption of files and partitions.
For such cases we have a card up our sleeve: The new Paragon Hard Disk Manager for Mac Preview helps you to easily manage this unallocated space and use it to create partitions, add the unallocated space to the existing partitions, resize free space between Mac OS and Bootcamp partitions and much more.
With HDM for Mac Preview you can resize your partitions in 3 clicks.
Click 1: Select the storage device you want to partition. Choose Move/Resize partition
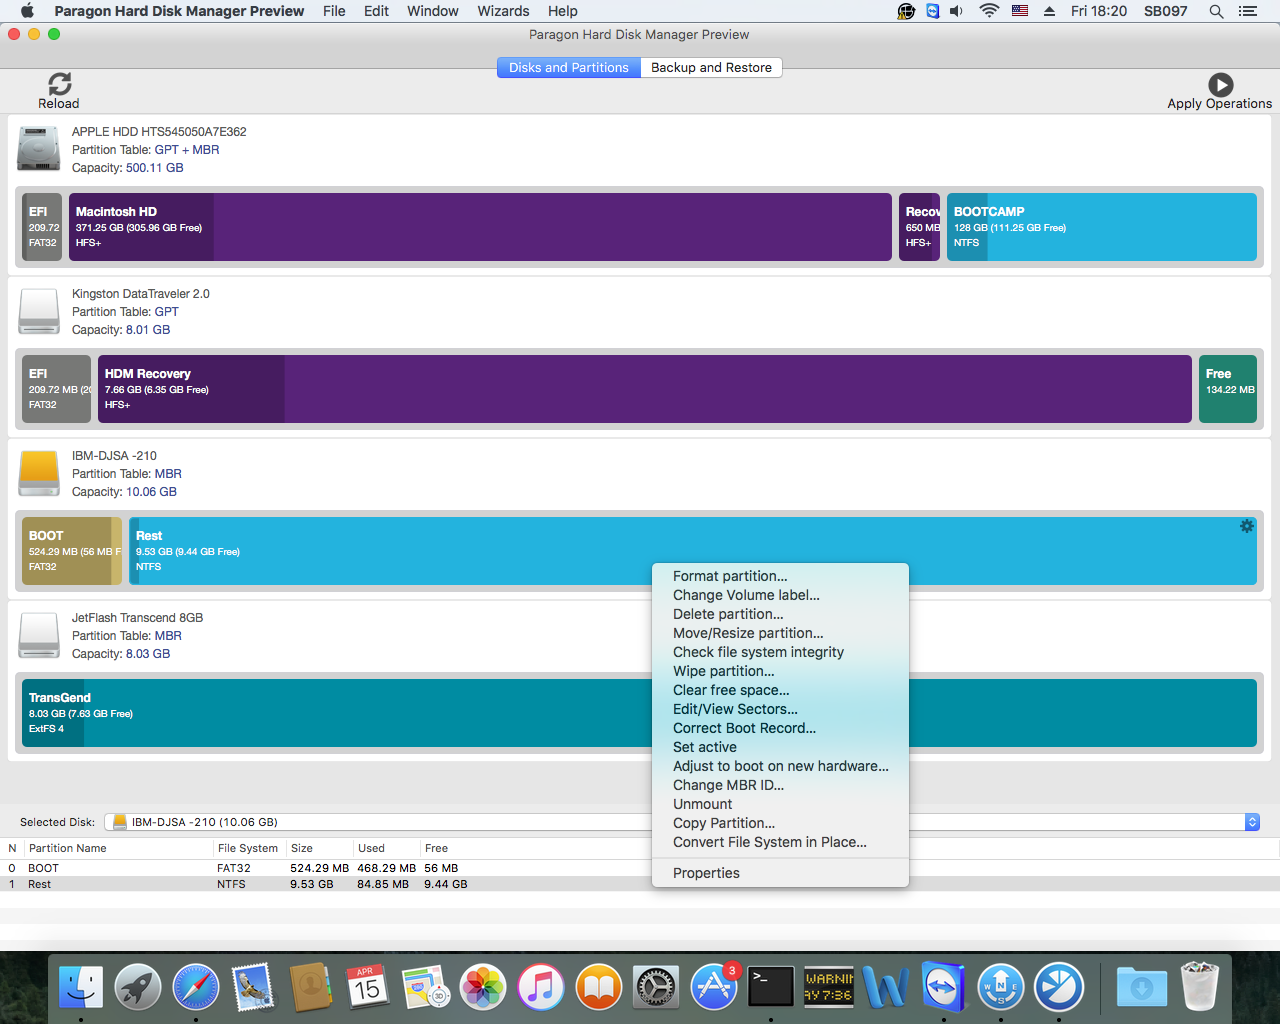
Click 2: Shift the anchor to select the size you need. Press OK

Click 3: Press Apply Operations at the top right of the menu

As you can see from the screenshot below, Disk Utility won’t show full information about an unallocated space on your storage device:
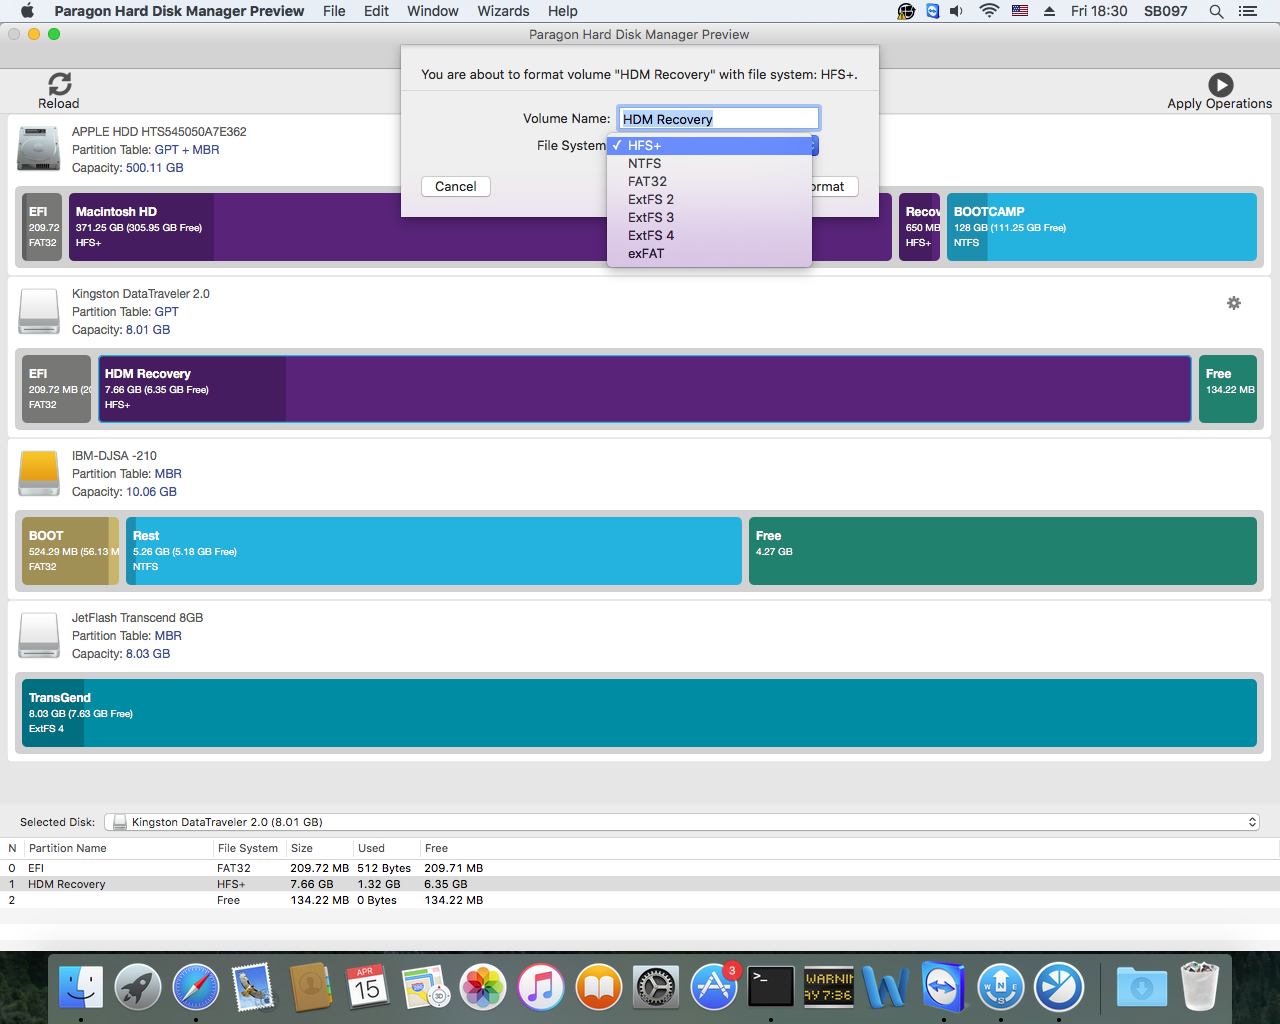
With HDM for Mac Preview you can additionally format all partitions to HFS+, NTFS, FAT32, ExtFS 2,3,4, exFAT:
Find these tips useful? Start using your Mac as a pro right now!
- System Integrity Protection in OS X 10.11
El Capitan support; - Core Storage backup and restore;
- Snapshot-driven backup;
Learn more about Paragon Hard Disk Manager for Mac