How to install macOS Sierra beta: quick Paragon guide

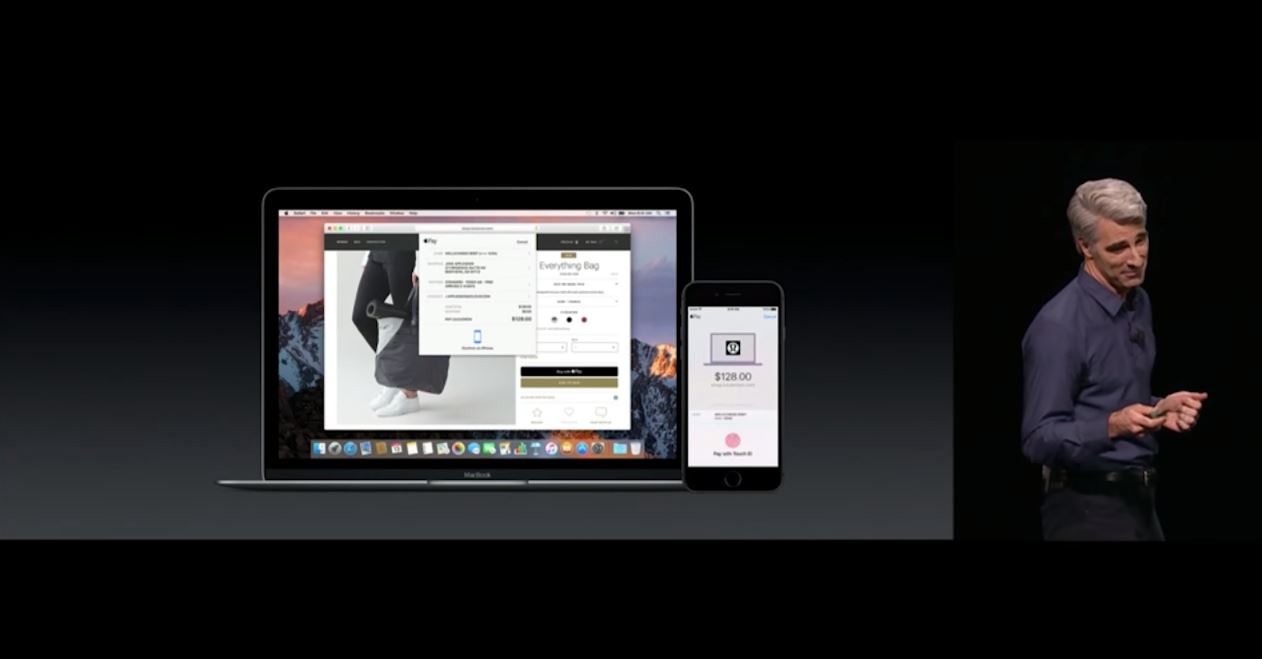
When it comes to announcing new software, Apple gets into an annual cycle. We saw the reveal of macOS Sierra at the Worldwide Developers Conference in June 2016, with a private beta issued to developers at the same time. A public beta, released on July 7, brought Siri, the picture-in-picture mode and a bunch of new Continuity features, like an Auto Unlock option for unlocking a Mac with an Apple Wtch and a Universal Clipboard for copying and pasting text from one Apple device to another.

One of the most exciting announcements was Apple’s new file system APFS, which is already available to Apple developers in a pre-release macOS Sierra beta version and is scheduled to ship in 2017. It’s optimized for Flash/SSD storage and features strong encryption, copy-on-write metadata, space sharing, cloning of files and directories, snapshots, fast directory sizing, atomic safe-save primitives and improved file system fundamentals.

On August 29th, Apple released the eighth beta of macOS Sierra to developers and the seventh beta version to public testers. Though most of macOS Sierra’s features were revealed at WWDC, there are still a handful of discoveries to look for.

If you have an iPhone or iPad and don’t want to wait for more than a week to try out the new Continuity features, like Universal Clipboard and others, you need to install the iOS 10 beta.

However, the software is still in beta stage meaning there could be bugs and interface issues. Make sure to back up your data before installing the beta. If you end up having a serious problem, you can revert back using your backup.

So, if you decided to install macOS Sierra beta, follow these steps:

1. Get the Installer here https://beta.apple.com/sp/betaprogram/. You’ll have to sign in using your Apple ID. Once you’ve signed in, the macOS Sierra beta will be downloaded to your machine.

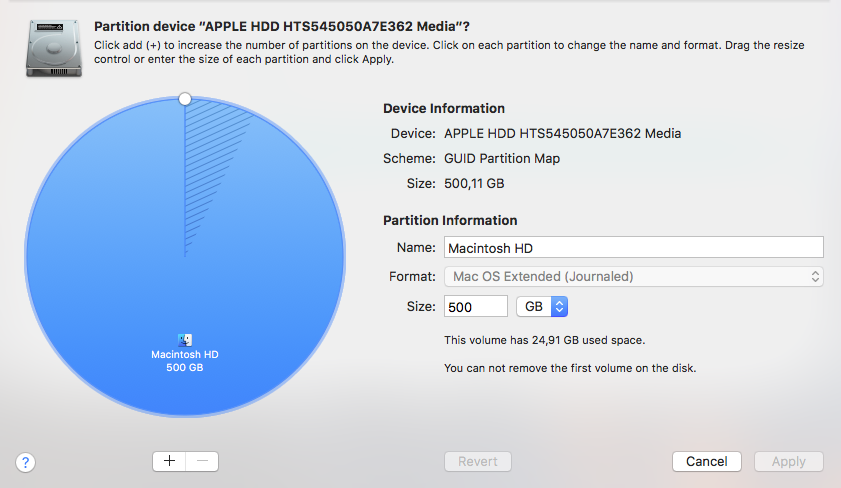
2. It’s a good idea to install the beta to a partition rather than over your main operating system. Open Disk Utility, click the “Partition” button, then click on the [+] plus button to create a new partition. You’ll need minimum 20GB for basic testing. Click “Apply” to create the new partition on the drive.
Create new partition

3. Run the Installer from the /Applications/ folder on the Mac.macOS Sierra installer

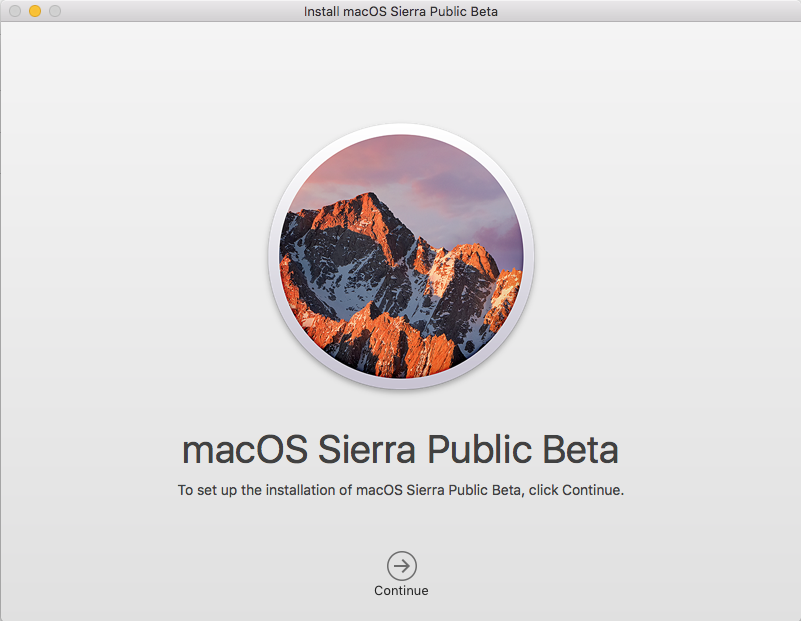
Go through the installation process, and when you get to the disk selection screen, choose “Show All Disks” and select the one you’ve created, click on “Install” to begin installing macOS Sierra to that partition.You will be asked, once again, to make sure you have backed up your data. If you have already created a back up with Paragon Hard Disk Manager for Mac and good to go, then just click “Continue” to proceed.HDM for Mac back up

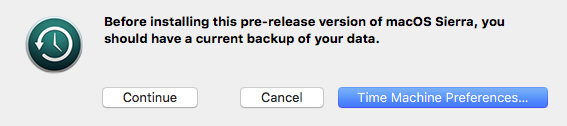
4. Restart your Mac after the installation is complete and set up your new Installation.Sign up with Apple IDmacOS Sierra diagnostic and usageiCloud keychain

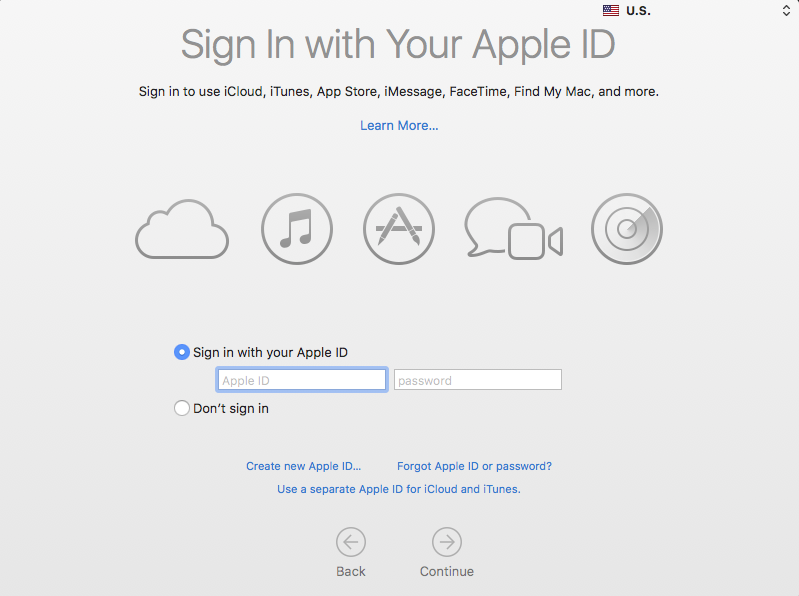
How to switch between macOS Sierra 10.12 and OS X El Capitan

Now you can easily switch between macOS Sierra and the earlier Mac OS X system:

1. Reboot the Mac from the Apple menu, as usual;
2. Hold down the “Option” key, when you hear the boot chime sound;
2. Select the drive and the operating system you want to boot from, then macOS Sierra or OS X El Capitan.

It’s that easy, you can reboot and switch between the operating systems running on the same Mac in no time!

Backup your Mac – efficiently and reliably!

Snapshot is the best technology to back up your data. The announced Apple File System (APFS) brings this long-anticipated file system mechanism. The arrival of the snapshot functionality in APFS promises big changes to Time Machine, which should completely replace the creaky, aging mechanism of hard links – a slow and resource-consuming process.

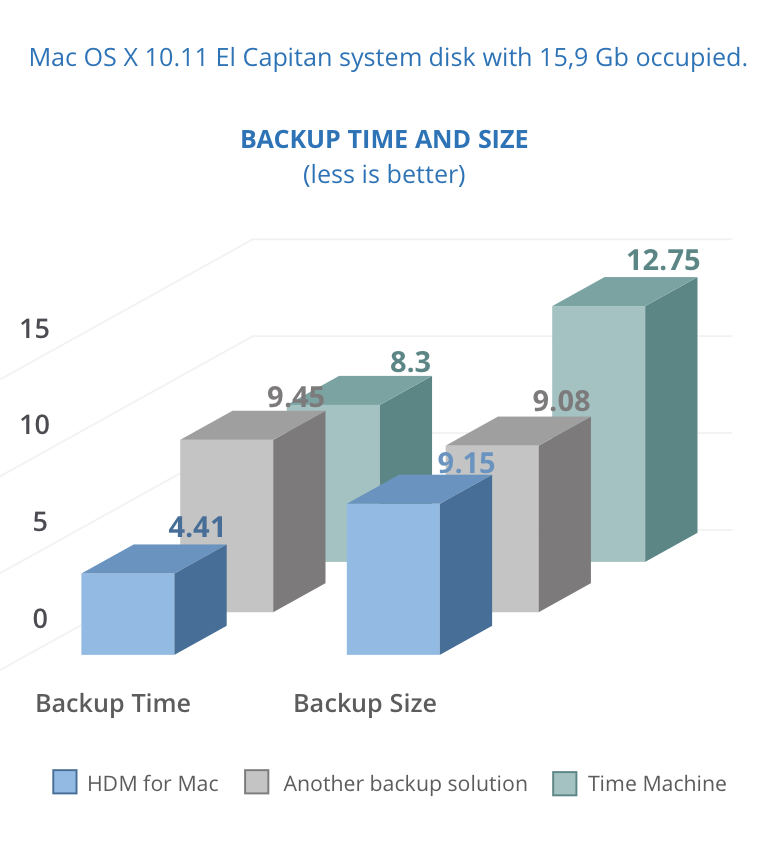
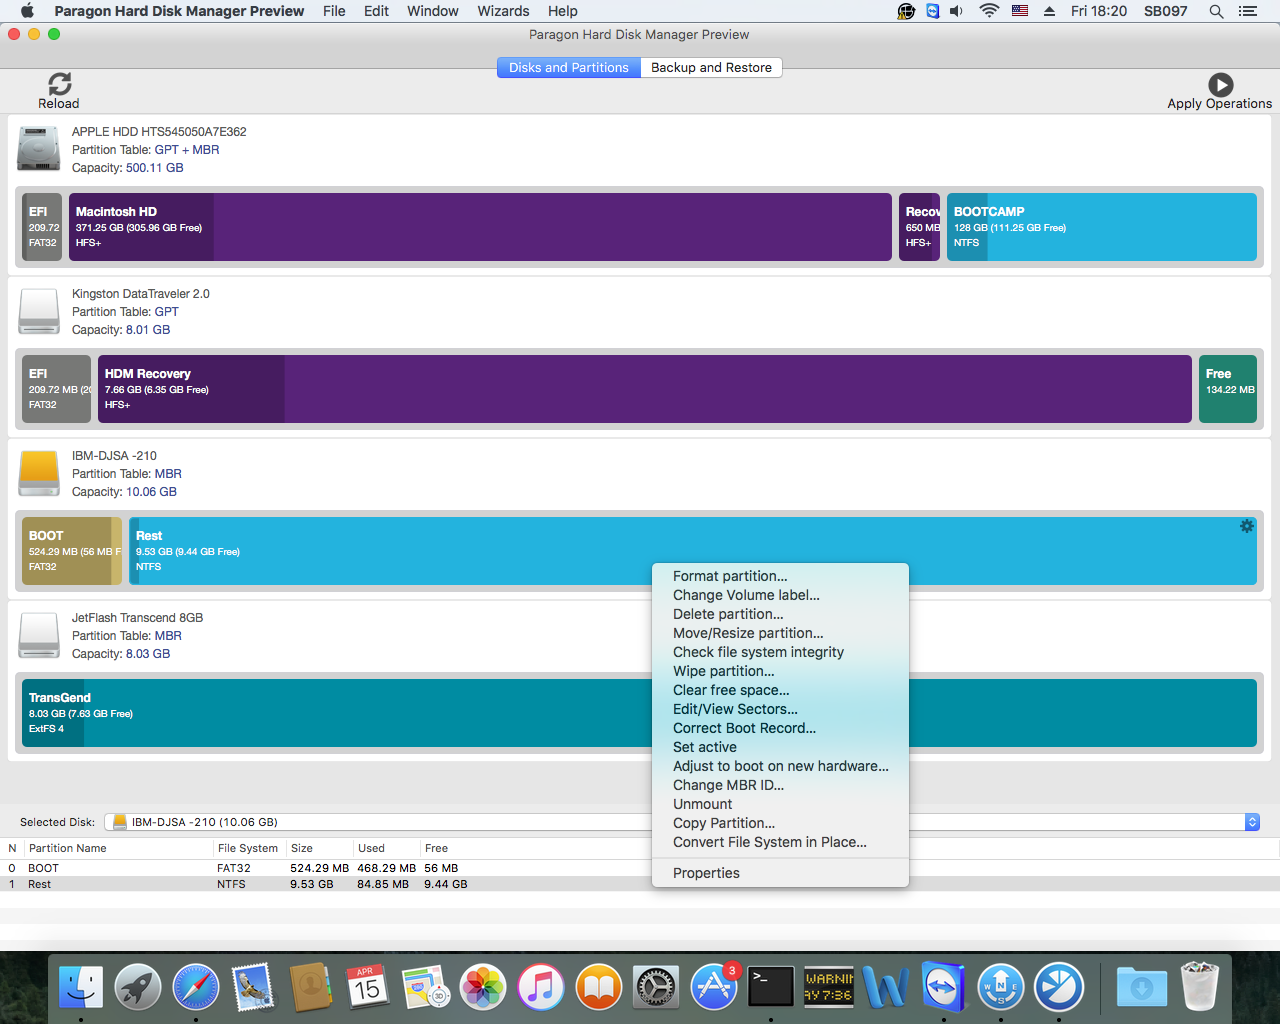
Paragon Hard Disk Manager for Mac delivers everything for data management, backup and recovery. It is designed to create instant copies of a disk (or several disks) at a specific point in time. This technology takes consistent snapshots of both inactive and in-use partitions. Unlike Time Machine, it provides snapshot-based backup and operates at the sector level, achieving superior performance and speed.

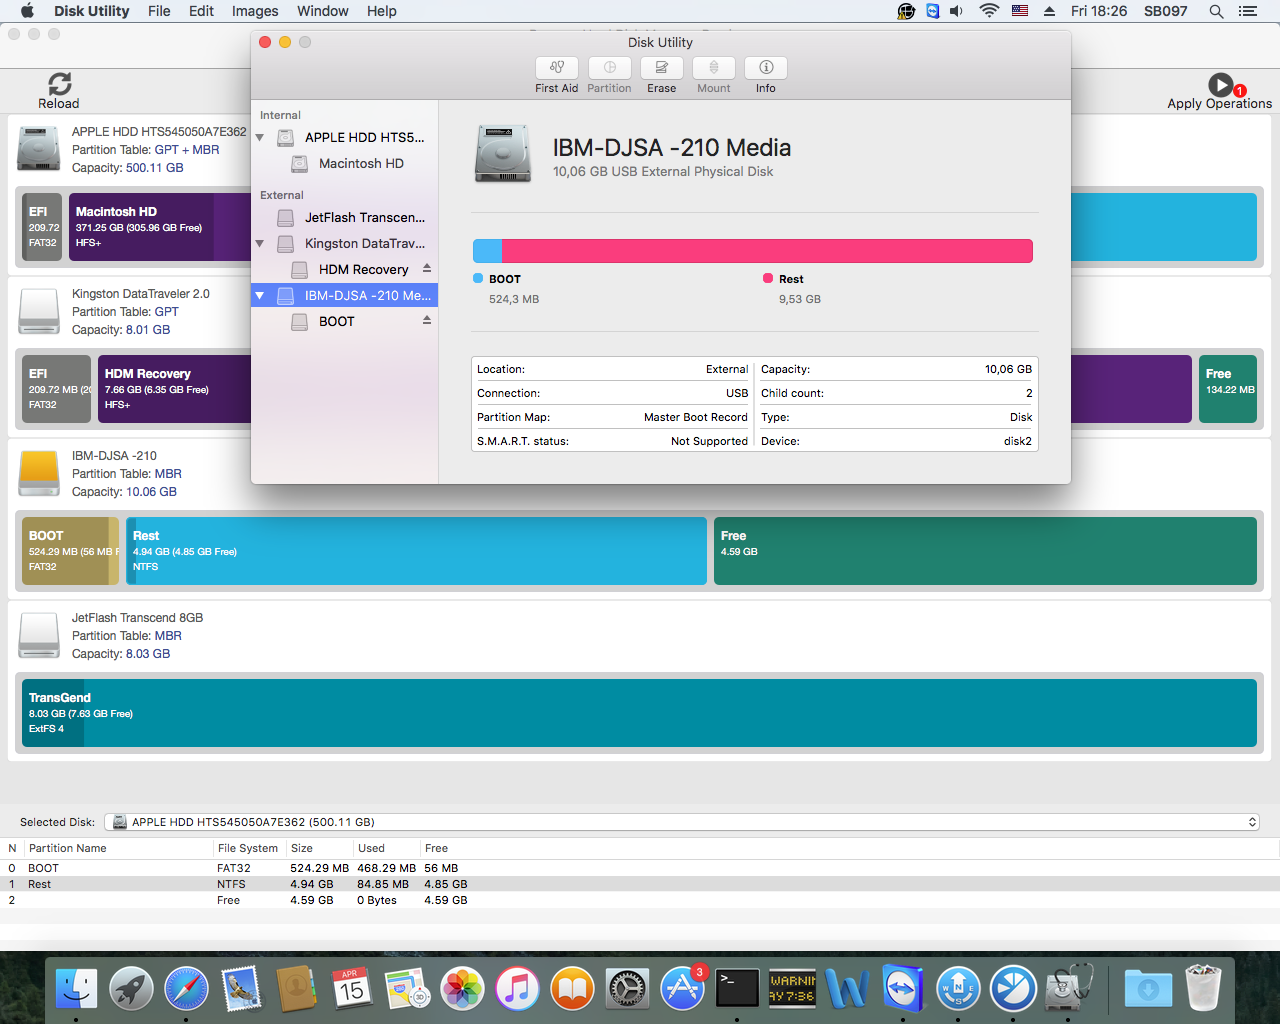
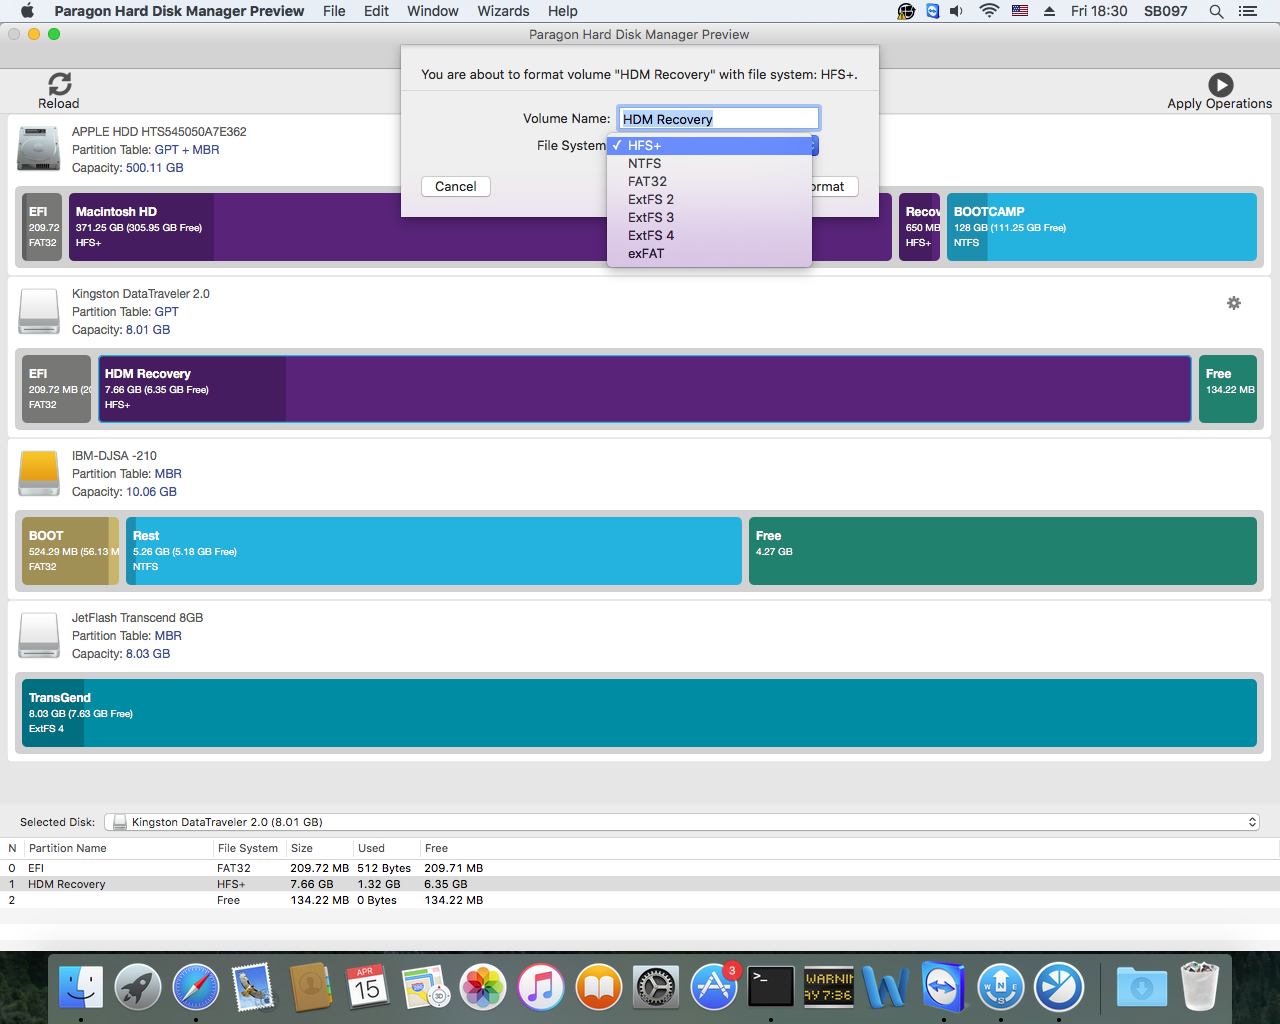
Paragon Hard Disk Manager for Mac is not just for backup — it’s a powerful application that covers all aspects of the computer’s life cycle, including drive partitioning, file system optimization and repair functions, irreversible data wiping. It also supports all OS X, Windows, and Linux file systems bridging incompatible systems. With Paragon Hard Disk Manager you can even back up data to affordable and popular NTFS-based carriers.

Enjoy the new macOS Sierra and its new features, and do not forget to back up your data and system with Paragon Hard Disk Manager for Mac!

Try Now

Paragon Software’s UFSD technology chosen by Western Digital to drive seamless connectivity for new WD Pro series

Our Universal File System Driver (UFSD) technology has been selected by Western Digital Corporation to provide advanced connectivity capabilities for the recently launched WD Pro series of products as part of an expanded software license agreement.

Building upon Western Digital’s use of Paragon’s NTFS and HFS+ UFSD drivers since 2009, the new agreement calls for Paragon’s exFAT technology to be embedded in a broad range of network attached storage (NAS) devices. In addition to supporting Western Digital’s new My Passport® Wireless Pro Wi-Fi® mobile storage product line, Paragon exFAT drivers will also be provided as a firmware update for the new My Cloud® Pro Series NAS, including the My Cloud® EX2 Ultra, My Cloud® EX2100, My Cloud® EX4100, My Cloud® DL2100 and My Cloud® DL4100 NAS devices.

Leveraging Paragon’s UFSD technology for the built-in SD card reader and USB 3.0 port, Western Digital customers can attach their NTFS, HFS+ and now exFAT for SDXC cards and other exFAT-formatted storage devices to WD’s Linux-based products and have rapid, transparent and full read/write access to these non-native file systems. The embedded Paragon drivers feature powerful utilities that maintain file system integrity and fully protect stored data, while delivering high performance for smooth playback and recording of Full HD Video content including 4K Video, with no limits on file or volume size. And by adding Paragon’s exFAT technology, WD products now support SDXC cards and provide maximum interoperability between Windows and Mac OS X operating systems.

“Paragon has already proven its value as a trusted software provider to our storage product lines and solutions, with powerful UFSD technology that enhances connectivity to create seamless cross-platform interoperability for our customers,” said Sven Rathjen, VP, marketing content solutions, WD. “We are pleased to extend and strengthen our partnership, and appreciate the top notch support we receive from their dedicated team.”

Western Digital’s new My Passport Wireless Pro Wi-Fi mobile storage device, offering up to 3TB of storage capacity, is built to accompany professional photographers and videographers in the field for easy and wireless offloading, editing and streaming of captured photos and HD videos. Also designed for creative professionals, and with up to 32TB of storage, the My Cloud Pro Series NAS solutions are optimized to import files from cameras, memory cards (with a USB adapter) and other USB storage with a simple one-touch backup button.

“Western Digital is a world-class company with world-class products. We are thrilled and honored to expand our partnership by supporting their exciting new mobile storage and NAS offerings,” said Tom Fedro, president, Paragon Software Group Corp. “Through the use of our UFSD products, Western Digital is not only delivering seamless connectivity, but also providing a greater customer experience.”

For more information on Paragon’s UFSD offerings, visit our website 

Paragon ExtFS for Windows 4 has been released! Extended Ext4 Linux File System Support, Higher Transfer Rate

We have finally released Paragon ExtFS for Windows 4 – an updated version of the utility software designed to grant full read and write access to Linux file systems under Windows. Paragon ExtFS for Windows simplifies data sharing, providing users with the ability to transfer files between otherwise incompatible systems at a higher data transfer rate than native file-system performance.

New features:

  • New! Supports nearly all of the latest Linux format Ext4: 64bit, dir_index, extent, extra_isize, ext_attr, flex_bg, has_journal etc. (Linux bigalloc, journal_dev, meta_bg features are not currently supported.)
  • New! The driver now works much faster, even when the Linux volume is short on free space. The product is able to transfer a larger amount of smaller files at twice the speed, with an increased rate of random read/write operations.
  • New! Unlimited trial version. Following the initial 10-day trial, the data transfer rate decreases to 5Mb/s, but the product otherwise remains fully functional.
  • New! For Windows users with less-frequent needs, the data transfer speed can be reset for up to 25 days free of charge by sharing with friends on Facebook via the in-app link.

The new version of Paragon ExtFs for Windows comes with extended support for Ext4 file formats, enabling the highest transfer speeds. The new ExtFS for Windows 4 mounts Linux volumes, including those over 2TB in size, up to two times faster than the previous version. Best of all, for owners of Paragon ExtFS for Windows Professional 3, the upgrade is free.

Paragon Hard Disk Manager for Mac

    • The new ExtFS for Windows mounts Linux volumes much faster, including large volumes over 2TB;
    • Ability to mount any number of Ext 2/3/4 partitions at once;
      • With ExtFS for Windows, the Linux logical volume manager retains all functionality, performing open, close, read, and write operations in the usual way!

 Learn more about Paragon ExtFS for Windows 4

ReFS Support added to Paragon Universal File System Drivers

Resilient File System (ReFS) was first introduced by Microsoft Corporation in the release of Microsoft Server 2012. Since then support of this file system has been integrated into Microsoft server and desktop operating systems like Windows 8/8.1, Windows 10, Server 2016 (Technical Preview).

ReFS was designed with one key goal in mind – file system integrity and the ability to verify and auto-correct data without need to run a separate file system checking utility.

To provide better NTFS file system compatibility for existing applications, Microsoft is using the same API for implementing file system semantics: “This code implements the file system interface (read, write, open, close, change notification, etc.), maintains in-memory file and volume state, enforces security, and maintains memory caching and synchronization for file data. This reuse ensures a high degree of compatibility with the features of NTFS that we’re carrying forward”.

Unfortunately even with the upper-layer engine nearly identical to what’s found in NTFS, up until now, only Microsoft platforms provided access to ReFS volumes; as a result, a Windows PC or a virtual machine running a supported Windows operating system would still be required to open files on Refs volumes from other platforms such as Linux, Mac, etc.

Paragon Software’s development team has been working on integrating ReFS file system support into our UFSD (Universal File System Driver) technology since 2012. We are happy to announce the present result of this work and release a Paragon UFSD driver that supports working with Refs volumes in read-only mode (full solution with both read and write support is under active development).

Introduction to the Paragon ReFS Universal File System Driver

1. Create a ReFS volume on Windows Server 2012 platform:

Create ReFS volume

2. Mount a ReFS volume on Linux:

Mount ReFS volume Linux

3. Copy data from ReFS on Linux:

Refs data copy on Linux

As you can see, with the help of the Paragon ReFS driver anyone can make a copy of their data from the ReFS volume on a Linux platform, without need for a Windows PC.

ReFS Compatibility within the Microsoft Ecosystem

With the release of Microsoft Server 2016 Technical Preview versions, Microsoft has shown that it continues to develop the ReFS file system. The newest ReFS version implemented into the Server 2016 Technical Preview 5 revision is not currently compatible with the previous Microsoft platforms, like Windows Server 2012 R2.

Attaching a ReFS volume from Windows Server 2012 to Windows Server 2016 (Technical Preview 5) – the ReFS volume is recognized:

Attach ReFS volume Windows Server

ReFS is now ready for your Read-Only workloads. If you want to to take advantage of this new technology, please contact Paragon’s sales team at sales@paragon-software.com.

While Apple’s new file system promises the snapshot, Paragon Software delivers it

One of the most exciting features Apple announced at WWDC 2016 was a new file system APFS (Apple File System) that’s going to replace CoreStorage, FileVault, FusionDrive, and the more than decade-old HFS by eventually becoming the default file system for all Apple gadgets in the coming years, from the Apple Watch to Mac computers.

Among other novelties APFS, currently available as part of the macOS Sierra beta, brings a long-anticipated file system mechanism called snapshot. In short, snapshot allows users to grab an instant copy of the file system at a specific point in time — effectively “freezing” data — while continuing to use and modify the file system while keeping old data intact. It does so in a space-efficient manner, where changes are tracked and only new data blocks take up additional space, which is extremely valuable for regular backup.

There are various snapshot technologies on the market, but the most well-known today is Microsoft Volume Shadow Copy Service (VSS), which is integrated into Windows XP and later. It’s no wonder most PC backup vendors utilize it instead of developing their own online backup solutions: Invoked by a supported backup utility (requestor, in Microsoft parlance), VSS saves the initial state of data blocks residing on disks by creating shadow copies for each volume involved in the process as virtual read-only devices. The backup utility then copies data from those shadow copies to a backup location, while OS and applications continue writing to the original volumes. This trick ensures consistency of backup data at any given moment, while allowing standard read/write operations for target storage devices during a backup process. Once the backup task is completed, the shadow copies are deleted.

Obviously, the arrival of similar snapshot functionality in APFS promises big changes to Time Machine, which promises to completely replace the creaky, aging mechanism of hard links that it builds and maintains – a slow and resource-consuming process. Currently, Time Machine has to wait until user applications are closed and locked files become available to process files, while ignoring system files at all, which is why OS X has a two-step restore procedure: Users first reinstall the operating system before restoring apps and user files from a backup image. Snapshot opens the door for fast, regular backup imaging of the entire system including user files, running applications, and operating system. By only saving changes when a file is updated, a snapshot-based backup app also requires much less disk space. All this promises that in the not-too-distant future, Time Machine backups could be faster and occupy less space than they do today.

In the meantime, the only snapshot technology available to Mac users is our Snapshot for Mac OEM. The concept of the Paragon Snapshot for Mac technology is based on embedding a special filter driver into a kernel input-output (I/O) stack between a block device and the file system. The goal is to save the initial state of data blocks on a disk at the time the snapshot is taken to provide backup data consistency, while the OS or applications continue modifying data on the same disk.

When attempting to write something to a block device for which a snapshot has been taken, the filter driver first copies existing data from the targeted blocks to a special temporary file called the backstore, and only then the writing operation is allowed. This way, Snapshot for Mac doesn’t prohibit rewriting data on the block device snapshot, but only postpones it until old data is copied to the backstore. Thus, for data blocks changed after a snapshot is taken, Snapshot for Mac provides a backup engine for initial data from the backstore, while unchanged blocks are stored directly on the device.

If you develop your own backup solution for Mac or represent a vendor of disaster recovery solutions for businesses of all sizes, you can make it even more robust by accelerating backup routines while increasing customer satisfaction and loyalty. Paragon Snapshot for Mac will help you to increase your target audience with companies whose businesses rely on Macs: For example, design firms, movie production studios, and more.

Paragon Snapshot for Mac OEM allows you to easily and quickly back up running applications and system-locked files, create RAW disk images, or an image of any volumes (e.g. NTFS or ExtFS-formatted Windows or Linux partitions).

In the newly updated version, Paragon Snapshot for Mac OEM doesn’t require a post-installation reboot, no longer loads and runs in the background when OS X starts up — all of which helps minimize any potential slowdown for the Mac. We designed it to achieve maximum productivity with a minimum of required operating system resources.

While Apple’s new file system promises the snapshot, Paragon Software delivers it — check out the full features of this amazing solution on our website!

Paragon Hard Disk Manager for Mac

  • The first snapshot technology for OS X;
  • The only solution for sector-level imaging;
  • 2-4 times faster than file-level backup/restore procedures!

Learn more about Snapshot for Mac OEM

“Back up, Forest, back up!” or How to outrun ransomware criminals by choosing the right Mac maintenance & protection solution

Ah, ransomware: Over the past few years, millions of PCs from around the world have been locked or had their files encrypted as a result of devious malware.

What we call “ransomware” today is a form of malware that is typically installed on one’s computer by way of a social engineering attack. The user gets tricked into clicking on a link or opening an attachment — once the malware is on the machine, it begins to encrypt all the data it can find there. Once completed, there will be two files in the directory that indicate which contents are being held hostage, alongside with instructions on how to pay the ransom in order to decrypt those files.

Sounds strange, but ransomware has become a very successful criminal business model. Some infamous examples of the “godfathers” of ransomware are CryptoLocker, Locky, and TeslaCrypt. One such outfit, CryptoWall, has generated over $320 million in revenues to date.

The first ransomware virus, AIDS Trojan (aka PC Cyborg), was created in 1989 by biologist Joseph L. Popp. The AIDS Trojan was first-generation ransomware that used simple symmetric cryptography, and tools were soon available to decrypt those filenames. However, the AIDS Trojan set the scene for what was to come.

According to Kaspersky Security Bulletin, in 2015 there were 1,966,324 registered notifications for attempted malware infections aiming to steal money via online access to bank accounts.  Various ransomware programs were detected on 753,684 computers of unique users; more than 179,000 computers were targeted by encryption ransomware.

In April 2016, CNN Money reported new estimates from the FBI which revealed the costs from so-called ransomware have reached an all-time high. Cyber-criminals collected $209 million in the first three months of 2016 by extorting businesses and institutions to unlock computer servers.

Unfortunately, there’s no end in sight. How can one protect himself and his valuable information from being encrypted into unreadable mess?

If I would think how to improve the usability and protect against crypto malware threats, I would suggest improving incremental backup strategies, which would supervise certain data sources, back them up automatically at any change, and allow them to be restored at any date in the time history. This way, I could easily revert back to before malware encrypted my files.”

The above suggestion was made via email from a Paragon Software customer, and indeed backup is a very efficient way to protect data. According to Oxford Advanced Learners’ Dictionary (developed by Paragon in conjunction with Oxford University Press), “backup is a copy of a file, etc. that can be used if the original is lost or damaged.”

One of the most popular backup tools is Time Machine – the built-in solution for Mac, introduced with OS X Leopard. Time Machine works at the file level, which is inefficient when dealing with an active operating system and running applications. Files should be unlocked or closed for proper backup, which is not an option with most system files and those used by currently running apps.

Time Machine waits until user applications are closed and locked files become available to process, ignoring system files completely. That’s why OS X has a two-step restore procedure: The user first reinstalls the operating system before retrieving application and user files from the backup image.

There’s a better backup approach based on system snapshots, which considerably reduces backup and recovery times. For a better understanding of this method, let’s visualize the entire process.

You want to back up a particular state of your Mac. However, you know that some files are being constantly changed by the system, and some might be changed by you — such as working with them during the backup procedure. It means that part of your system will be backed up at one point of time and the rest some minutes later. This causes inconsistencies with file properties, and you won’t be able to restore references and links between such files.

Snapshot is like taking a photo of your filesystem, excluding changes made after that point. They will still be present on your hard drives and will be included with the future backups, but not the current one. That’s exactly why this is the only backup method that can be used to protect an active operating system. Additionally, although Time Machine waits until running applications are closed and locked files become available, the backup operation obviously takes more time than if it’s done with a snapshot-based utility.

To illustrate the difference, we performed an internal lab test, comparing the brand new Paragon Hard Disk Manager for Mac against Time Machine and another popular file-level backup solution. Have a look at the results:

Paragon Hard Disk Manager, backup, fastest

Paragon HDM for Mac is designed to create instant copies of a disk (or several disks) at a specific point in time. This technology takes consistent snapshots of both inactive and in-use partitions. Unlike Time Machine, HDM provides snapshot-based backup and operates at the sector level, achieving superior performance and speed.

As you can see from the graph above, it takes Hard Disk Manager far less time to back up 9.15 Gb of information than Time Machine or a similar solution. HDM for Mac comes with improved snapshot technology, enabling consistent image backups even as the data is being modified at that moment.

HDM for Mac is not just for backup — it’s a powerful application that covers all aspects of the computer’s life cycle, including drive partitioning, file system optimization and repair functions, data backup capabilities, and irreversible data wiping. It also supports all file systems of OS X, Windows, and Linux.

Get it now! Seriously, it’s that good.

Paragon Hard Disk Manager for Mac

  • System Integrity Protection in OS X 10.11
    El Capitan support;
  • Sector-level backup for best perfomance and backup/recovery speed;
  • Move, resize, undelete partitions and modify their properties;
    • Migrate Windows OS from one Mac computer to another;
      • Format volumes in any of the common file systems (NTFS, HFS+, ExtFS, FAT 16/FAT 32 and exFAT);
      • And much more!

Learn more about Paragon Hard Disk Manager for Mac

Keep your friends close and your hard drives closer: Safely managing disks on your Mac

Keeping personal information truly confidential is something of a challenge in the modern world. Our every move is being recorded, with eyes watching from each corner. It may sound paranoid, but this is the new reality. With our smartphones, social media, and messaging apps, almost everyone is now an open book.

One of the safest ways to keep your information secure is to store it in on your Mac’s solid-state drive (SSD) without access to an internet connection — but that’s nearly impossible these days, right?  For most of us, it’s generally good enough just to be careful when browsing the web and avoid clicking any suspicious links.

But let’s take a look at the worst-case scenario: What if your information is stolen or taken away from you by an employer, roommate, or even the government? What if you decide to sell or donate your Mac? It ultimately doesn’t matter who got access to it — it’s imperative that you destroy personal data before the bad guys grab it.

So how can you make sure your sensitive data doesn’t fall into wrong hands along with your hard disks (HDD) or other media? Physically shredding old disks into tiny pieces is impractical, even if it may ultimately be the safest data method of destruction.

For years, OS X has allowed users to erase data from disks using native tools included with Apple’s Disk Utility. When you select a volume in Disk Utility and click the Erase tab, you can select Security Options and choose how many times the media will be written over. But this procedure is very time-consuming, and you can’t wipe free space on the disk with this method.

Unlike traditional hard drives, it’s no trivial matter to recover data stored on SSDs, due to the way the hardware optimizes storage to reduce wear and tear. But this is by no means foolproof, since there are readily available tools capable of easily reconstructing SSDs that have been erased.

One simple way to protect data is to encrypt it from the very beginning on a new SSD or HDD using FileVault 2. This is a full-disk encryption option that first appeared in OS X Lion 10.7, which keeps your startup volume encrypted at all times. Whenever you boot your Mac and log in to the account via FileVault 2, OS X encrypts everything written to the disk and decrypts everything that being read.

Erasing a FileVault-encrypted volume discards the decryption key, turning your disk into an unreadable mess. Without the key, the erased data is as good as gone. The only problem with this solution is that should you forget your account credentials or lose the recovery key, your data will be permanently lost.

So we are left with the only suitable option: Wiping the drive. When you wipe a HDD or SDD, you erase everything on the disk, including data you previously deleted that might still exist.

When you format a hard drive or delete a partition, you usually delete only the file system, making data invisible but not entirely erased. You need to take an extra step to clean the hard drive completely using specialized data wiping tools. This software works by writing over every divisible part of the drive, used or otherwise.

One of the best tools on the market for a logical-level wiping of your hard drive is Paragon Hard Disk Manager for Mac. It supports all Intel-based Macs, providing tools to quickly and efficiently sanitize hard disks to protect valuable information.

You can irreversibly destroy all data on your disk in compliance with the major national government and military data standards. For only $39.95, you receive a powerful tool to manage data on your hard disks, and keep valuable information completely under your total control.

Paragon Hard Disk Manager for Mac

  • System Integrity Protection in OS X 10.11
    El Capitan support;
  • Core Storage backup and restore;
  • Snapshot-driven backup;

Learn more about Paragon Hard Disk Manager for Mac


“No complaint about the lack of windows”: the new era of Apple multi-platform environment

Yesterday at WWDC 16 Apple presented its new macOS Sierra – the spiritual successor of OS X 10.11 El Capitan. The era of “OS X” as part of the name has ended.

With the new name, macOS Sierra focuses mainly on cross platform experience, continuity, and iCloud.

To start with, Apple announced a new auto-lock feature which allows Apple Watch wearers to unlock their Mac simply by opening it or walking into its vicinity. The other newcomer is a universal clipboard – a shared clipboard between macOS and iOS that allows users to easily share text, images, or video between Mac, iPhone, or iPad.

Apple also brings Apple Pay to the web, allowing the authentication of online payments on Mac via Apple Watch or iPhone with Touch ID.

Apple Pay

The trend is clear – Apple is trying to make the experience between devices seamless. Siri on the new macOS is the cherry on the cake. After allowing Siri to introduce herself, like it was done in the original 1984 Mac demo, Craig Federighi showed off several Siri desktop features that should look familiar to iOS users, like calling up playlists, creating tasks, or searching the Web.

Talking about iCloud, it now plays an expanded role in synchronization, making your desktop folders and files visible on other Macs and iOS devices. Another new feature called Optimized Storage can sweep through old files and move them to iCloud, thus making room on local disk space for other purposes. Moreover, it can automatically delete your trash, clear your Web history, old mail attachments, and do other behind-the-scene clean-ups.

Optimized Storage

Another feature, that wasn’t introduced on the presentation, is the new file system which is available in a pre-release macOS Sierra beta version for Apple developers and is scheduled to ship in 2017.

“Apple File System is a Next-Generation File System for Apple Products” – says the Apples guide published yesterday, – “HFS+ and it’s predecessor HFS are more than 30 years old. These file systems were developed in an era of floppy disks and spinning hard drives, where file sizes were calculated in kilobytes or megabytes. Today, solid-state drives store millions of files, accounting for gigabytes or terabytes of data. There is now also a greater importance being placed on keeping sensitive information secure and safe from prying eyes. A new file system is needed to meet the current needs of Apple products, and support new technologies for decades to come”.

Accordingly, Apple File System, or APFS, is a next-generation file system for Apple products based upon the iOS, macOS, tvOS, and watchOS software platforms, ranging from the Apple Watch to a Mac Pro. It’s optimized for Flash/SSD storage and features strong encryption, copy-on-write metadata, space sharing, cloning for files and directories, snapshots, fast directory sizing, atomic safe-save primitives, and improved file system fundamentals.

In conclusion, it seems like Apple is making steps to ease the multi-platform experience. However, it takes time to reach perfection and during this lengthy journey, Paragon Software products including HDM for Mac, NTFS for Mac, or EXTFS for Mac can help you to always be on the cutting edge.

Paragon Hard Disk Manager for Mac has been finally released!

We decided to take the next step in our development and present you with our most expected product – Paragon Hard Disk Manager for Mac! Most of you are already familiar with Hard Disk Manager for Windows or even have it installed on your PC. Now, we release Paragon Hard Disk Manager for Mac!

We developed a product that includes all the tools the OS X user needs. Everything from what’s OS X is missing plus comprehensive functionality to easily manage your OS X systems, so once you start using HDM for Mac, you wouldn’t have to run across the web searching for additional programs to successfully manage your Mac. HDM for Mac covers it all!

Enjoy this new powerful Mac solution!

Paragon Hard Disk Manager for Mac

  • System Integrity Protection in OS X 10.11
    El Capitan support;
  • Sector-level backup for best perfomance and backup/recovery speed;
  • Move, resize, undelete partitions and modify their properties;
    • Migrate Windows OS from one Mac computer to another;
      • Format volumes in any of the common file systems (NTFS, HFS+, ExtFS, FAT 16/FAT 32 and exFAT);
      • And much more!

Learn more about Paragon Hard Disk Manager for Mac

We would like to thank our beta-testers and everyone who supported the project – with your help we were able to gather the most valuable feedback and develop a great new product!

Why do you need an extra partition on your Mac and how to create it

Today we’re going to talk about partitions. What is it anyway?

A partition is a specific area of a hard drive, which has a beginning and an ending point, and the space between those points equals the total amount of size the partition defines.

Sometimes people confuse a partition with a volume, but there is a big difference between the two.
A volume is a file system on a partition your Mac or PC can recognize. Common types of volumes include DVDs, hard drives, and partitions or sections of hard drives.

Practically any type of storage you use for your Mac (SSDs, hard drives, USB flash drives, etc.) can be divided into partitions. Each partition can use one of four formats compatible with OS X: HFS/HFS+ (simple and encrypted), ExFAT and FAT.

There are good reasons to split your device into multiple partitions. For example, you want to run multiple versions of OS X on your Mac; organize your data PC-style; manage your backups efficiently or run Windows on your Mac. Especially if you are a big fan of OS X and install all OS X beta-versions, it is strongly recommended by Apple to install all beta versions on a separate partitions, as they can truly ruin your Mac!

To partition a drive, we can use the Disk Utility – a built-in Mac program to manage your hard drives.

NB: Your data will be erased during the procedure, so be sure to back up the information first.

  • Step 1: Open the Disk Utility by searching for it via Spotlight or finding it in Applications > Utilities
  • Step 2: Select the storage device you want to partition from the left pane. The selected drive will appear in the right pane together with its details, such as location, the way it’s connected, and the partition map in use
  • Step 3: Select the drive and then click the Partition button in the Disk Utility’s Toolbar. You will see a drop-down panel displaying a pie chart of how the drive is currently divided
  • Step 4: To add a partition, click the plus (+) button right below the pie chart
  • Step 5: Enter a name for the volume in the Partition field to be displayed on your Mac’s desktop. Press Apply

You can also adjust the volume size by either entering its value in the text box, or by shifting a pie slice anchor in the required direction.

However, some errors might occur in the process, causing you to end up with an unallocated space on your disk unseen in the Disk Utility. An unallocated space is like a void on your hard drive you can’t detect and use with Mac’s inbuilt apps. The only way to manage such space is to use the Terminal, but it is rather complicated and may lead to corruption of files and partitions.

For such cases we have a card up our sleeve: The new Paragon Hard Disk Manager for Mac Preview helps you to easily manage this unallocated space and use it to create partitions, add the unallocated space to the existing partitions, resize free space between Mac OS and Bootcamp partitions and much more.

With HDM for Mac Preview you can resize your partitions in 3 clicks.

Click 1: Select the storage device you want to partition. Choose Move/Resize partition

HDM for mac Preview

Click 2: Shift the anchor to select the size you need. Press OK

Resize partition

Click 3: Press Apply Operations at the top right of the menu

Press Apply

As you can see from the screenshot below, Disk Utility won’t show full information about an unallocated space on your storage device:

Unnalocated space

With HDM for Mac Preview you can additionally format all partitions to HFS+, NTFS, FAT32, ExtFS 2,3,4, exFAT:

FAT32, NTFS, exFAT, HFS+

Find these tips useful? Start using your Mac as a pro right now!

Paragon Hard Disk Manager for Mac

  • System Integrity Protection in OS X 10.11
    El Capitan support;
  • Core Storage backup and restore;
  • Snapshot-driven backup;

Learn more about Paragon Hard Disk Manager for Mac

Paragon Hard Disk Manager for Mac